3D Construction Set

Requires a Wolfram Notebook System
Interact on desktop, mobile and cloud with the free Wolfram Player or other Wolfram Language products.
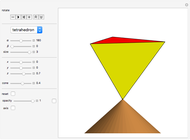
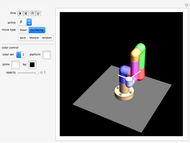
Build your own three-dimensional constructions (called "projects") from a menu of 49 object types such as 3D curves, cuboids, spheres, cylinders, rectangles, and many others.
[more]
Contributed by: Karl Scherer (June 2008)
Open content licensed under CC BY-NC-SA
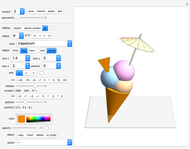
Snapshots


Details
Editing
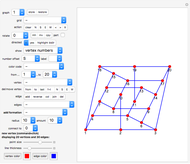
The "project save/restore/paste/add" pop-up menu lets you create and edit projects. A saved project can be pasted over any existing project, it can be added to an existing project, or (with "action = insert") you can create additional projects.
Twenty projects are given to start you off, but the number of projects you can build is unlimited.
Projects 2,...,11 show some possibilities. All the other projects given consist of a basic setup only (a cylinder on a mesh).
You can save or restore a project, or reset it to default (which shows a cylinder on a mesh).
The "specularity" slider sets the reflectivity of the project and thus creates highlights.
A project consists of a series of "objects". The "display" setter bar lets you choose whether only the current object is being displayed or all objects up to the current or whether all objects shall be displayed.
There is also a toggle which causes all object numbers to be displayed.
The number of the currently edited object, its type, size, rotation, and position etc can be edited.
Use the "object" pop-up menu to change the object sequence number. Click "<<","<",">" or ">>" to select the first, previous, next or last object.
Use the "type" pop-up menu to change the object type.
Use the "copy" button, then the "insert" buttons to add a new object after the current object (see further down).
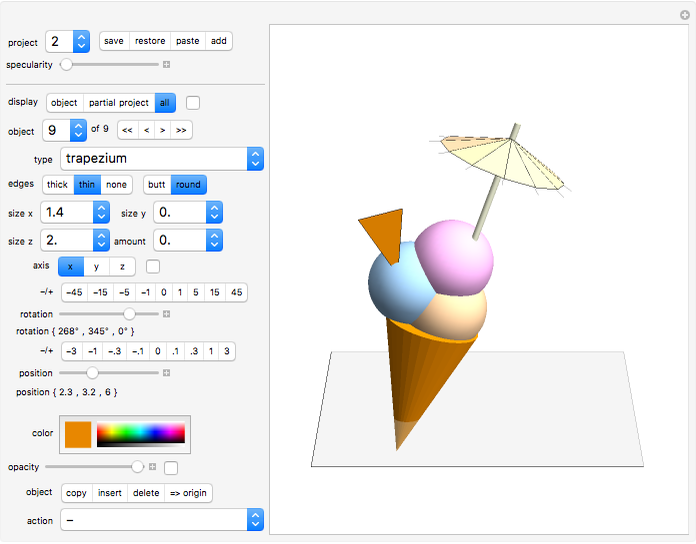
Project 5 is a combination of projects 1, 3 and 4, created with the "add" option of the "project save/restore/paste/add" setter bar.
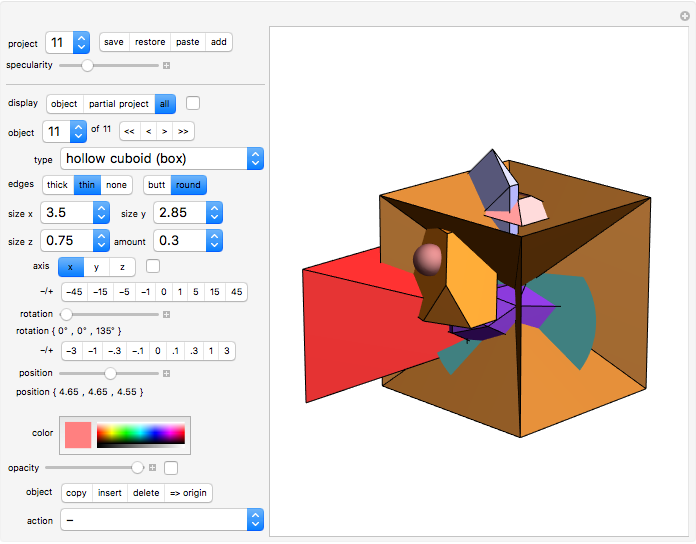
Project 11 was created from project 2 with just two clicks (using randomizing actions; see the "action" pop-up menu).
With the randomizing "actions" and the "3D random curve" , you can let the computer do much of the creative work to create abstract pieces of art in seconds (more details below).
For various reasons, some controls are stored once with the project, not with each object. These are: specularity, display-object-numbers toggle, butt/round toggle, show-axes toggle and global-opacity toggle.
Auto-save If you select another project or another object number, the current project will be automatically saved.
Object types
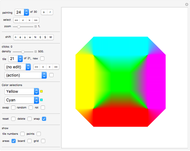
Available types of piece are: point, line, 3D curve (tube), closed curve, random 3D curve, torus, trapezium, regular polygon/star, mesh, spiral surface, spiral staircase, spiral tube, ellipsoid, cylinder, cuboid, hollow cuboid, 3-sided prism, regular  -sided prism/pyramid, hollow regular -sided prism/pyramid, partial cylinder, partial tube, star-shaped prism, hollow star-shaped prism, pearl chain, pearl, dome, spokes, circular ornaments, ring, windmill, windmill blade, octahedron, dodecahedron, icosahedron, truncated tetrahedron, truncated cube, truncated dodecahedron, truncated icosahedron, truncated octahedron, snub cube, snub dodecahedron, cub octahedron, great rhombicosidodecahedron, great rhombicuboctahedron, icosidodecahedron, small rhombicosidodecahedron, small rhombicuboctahedron, and a few special bodies called "sample 1", "sample 2", and so on.
The "pearl chain" is a circular arrangement of spheres.
Triangles can be constructed as a trapezium with  .
.
Ellipses can be constructed by using an elliptic cylinder with  .
.
You can temporarily hide any existing object by setting its size to zero.
Controls
For the currently edited object you can select the type of piece, its size, its color, its opacity, its rotation in space, its placement etc. In detail:
"Edges thin/thick/none" setter bar: Select here whether you want your piece to have thin edges, thick edges, or no edges marked in black at all.
"butt/round" setter bar: this controls whether the ends of tubes are flat or rounded; it applies to all "curve" object types.
"Size  ", "size
  ", "size
  ", "amount" pop-up menus: The meaning of sizes and amount depend on the object type selected, see chapter "sizes" below.
The control "amount" is used by the following object types: trapezium, spiral, cuboid, hollow cuboid, regular -sided prism, partial cylinder, partial tube, star-shaped prism, spokes, circular ornaments, ring, windmill, pearl chain, and dome. Usually it denotes the multiplicity of a part. Fractional amounts are allowed and can lead to interesting effects. For details see the chapter on sizes below.
"Axis x/y/z setter bar" : Select which dimension you want to work on regarding the rotation and positioning of the current object.
Click the toggle next to the x/y/z setter bar if the x-, y- and z- axis should be displayed.
"+/- -45/-15/-5/-1/0/1/5/15/45": Select incremental rotations here (in degrees).
"rotation" slider bar: Select a rotation here.
"+/- -3/-1/-.3/-.1/0/.1/.3/1/3": Select incremental positional shifts here.
"position" slider bar: Select an absolute position here.
"Color": Choose a color for the current object.
"opacity" slider bar and toggle:
Click the toggle to the right of the opacity slider to show all object with the same current opacity.
What the "sizes" mean for the various object types
For a "point" object, we use PointSize = size / 10. "Size " and "size " are not used.
Unrotated lines are positioned along the axis. For lines, "size " and "size " define the distance of the endpoints to the point of origin and "size " denotes the line thickness (times fifty).
Object types "3D curve (tube)" and "3D closed curve" use PREVIOUS objects as markers (position setting)! In detail:
"3D curve (tube)" and "closed curve" are a very special object types since they rely on a set of points given rather than on one position only. "size " describes the overall size (e.g., "size " = 2 doubles the size). Furthermore "size " describes the thickness, "size " the smoothness of the curve (an integer between 0 and 6), and "amount" describes the number of points used. Hence an amount of "4" means that the position of the four previous objects are used to form the curve. Note that these four previous objects can be of type "point". If these points should be invisible, set the opacity slider to zero. The given project 3 (knot) is an example for a closed curve. It consists of 15 objects of type "point" and one object of type "closed curve". Never select an "amount" greater than the number of objects preceding a tube! Ich you want variable width for the tube, set "size = 0"; the system will take the width ("size values) from the previous objects (see project 8).
Project 8 shows the same curve, this time with variable thickness. This has been triggered by setting "size = 0"! The various thicknesses have been taken (by the system) from the "size y" values of the previous objects (which are all of type "point" here. This way you fully control the varying thicknesses. After changing a variable width (the "size " value of a previous object) , activate it by hitting "project save".
A "random 3D curve" is contained in the box with measurements width = "size ", depth = "size ", height = "size ". Further, "size " is the thickness and "amount" (>= 2) is the number of random vertexes used. Select action "randomize 3D curve" to create a new set of vertices (for the B-spline curve which defines the 3D tube). If you set the thickness ("size ") to zero, then the system will also randomize the thickness of the tube (the thickness will change at each vertex).
A "torus" is described by x-axis length "size ", y-axis length "size  , thickness "size " and resolution "amount".
Unrotated "trapeziums" and "meshes" are presented in the horizontal position (- plane).
For a trapezium, "size " and "size " are the lengths of the parallel sides, "size " is their distance from each other, and "amount" is the deviation from mirror symmetry (the translation of one parallel side relative to the other). If  , then the trapezium is a parallelogram. If additionally
  , then the trapezium is a rectangle.
For a regular (elliptic) polygon/star, "size " and "size " are the radii of the ellipse and "amount" is the number of sides. Every second vertex has its distance to the origin multiplied by "size ", which creates a star if  .
.
A "mesh" is a rectangular grid of lines in the - plane and "amount" denotes the number of intervals in the mesh; "size " is not used.
For a "spiral surface" or "spiral staircase", "size " is the radius, "size " is the number of turns per unit height, and "size " is the height of the spiral; "amount" is the resolution (number of steps per 360 degree turn).
For a "spiral tube", "size " is the radius, "size " is the number of turns per unit height, and "size " is the height of the spiral; "amount" is the thickness of the tube. The resolution (number of steps per 360 degree turn) is internally set to 8.
To create a sphere, select the type "ellipsoid" and set identical values for "size ", "size ", and "size ".
For a cuboid or an open cuboid, the top rectangle can be enlarged by "amount", causing sloped sidewalls; setting "amount" to 1 yields a rectangular box shape.
To create a cube, select the type "cuboid" and set identical values for "size ", "size ", and "size ", and set "amount" to 1.
For (elliptic) cylinders, "size " and "size " denote the half-diameter of the defining ellipse; "size " denotes the length of the cylinder.
For 3-sided prisms, "size " and "size " denote the base and height of a symmetric triangle; "size " is the height of the prism.
For the regular -sided prism, "size " denotes the radius of the regular -gon at the bottom and "size " the radius at the top; "size " is the height of the prism and "amount" is the number of sides. For pyramids set "size " to zero.
For a partial cylinder, "size " is the radius, "size " is the height, "amount" is the angle in degrees (36 means 360 degrees), and  is the number of sides.
For a partial tube, "size " and "size " are the radii, "size " is the height, and "amount" is the angle in degrees (36 means 360 degrees).
For spokes, "size " and "size " denote the distance of the line end points from the center, "size " is the height of the cone of the spokes, and "amount" denotes the number of spokes.
For an elliptic -sided ring, "size " and "size " denote the inner and outer radii, "size " is the enlargement of the ring in the direction (making it elliptic), and "amount" is the number of segments. The same holds for for elliptic ornaments.
For a windmill, "size " and "size " denote the inner and outer radii, "size " the height of the cone, and "amount" the number of blades. The same holds for object type "windmill blade".
For the pearl chain, "size " and "size " denote the radii of the elliptical chain, "size " is the radius of the pearls (spheres), and "amount" is the number of pearls in the circular chain.
The type "pearl" is a sphere offset from the origin by "size ". The pearl radius is "size "; "size " is not used here.
The type "dome" is a collection of tiles forming the top of a sphere with radius "size ", extending from the north pole up to latitude "size " (1 unit is 36 degrees). Longitudes are covered from zero up to "size " (10 corresponds to 360 degrees). A full sphere is obtained using  and
and  . Finally, "amount" is the resolution (i.e., the number of tiles used along a longitude or latitude).
"Object copy/insert/delete/=>origin" setter bar
When you have finished editing an object, click the "save" project button at the top to save your changes. (Using "copy" or selecting a new object sequential number saves the current object automatically).
With "copy" and "insert" you can copy an object to any other place in the sequence (but not to the first place).
"Copy" will save the current state of the project and make an internal copy of the current object.
"Insert" will insert the internal copy after the current object, and will place it at the same 3D position as the original object. There is an exception for objects of type "3D curve", which are actually curved tubes around B-spline curves. B-spline curves (which rely on several given points) cannot have two sequential points to be the same. If you ever come across a case where the curve is invisible, check that sequential points are not the same and that there are at least two points given (i.e., "amount" must be an integer greater than one), otherwise the curve is invisible.
Click the "delete" button to delete the current object. You cannot delete an object if it is the last one.
Clicking button "=>origin" positions the current object at {0,0,0}.
Note that there is also an "action" (see below) which inserts a stored copy of an object at the first place of all objects.
Actions
If the current object is of type "random 3D curve", click action "randomize 3D curve" to create a new random set of vertices for the B-spline curve underlying the curved tube.
Click action "rnd curve thickness" if you want to vary the thickness of a random curve (here "size z" controls the maximum size of these variations). Click this action again to use only one thickness (namely "size z").
"size x => all" ("size y => all","size z => all") copies the current size to all stored objects of the project.
The actions "amount => all', "x => all",... work similarly.
"Randomize object types" exchanges the object type of each object in this project.
"Randomize sizes, amount randomizes "size ", "size ", "size " and "amount" (all varied between 0 and 5).
"Randomize pos x,y,z" randomizes the positions of the objects (x,y,z varied between 0 and 5),
"delete objects < current" deletes all objects with sequence number smaller than the current one.
"delete objects > current" deletes all objects with sequence number greater than the current one.
"add 10x10 mesh" add a mesh which is positioned in the x-y-plane, with one corner being the origin {0,0,0}.
"saved object => first" inserts a stored copy of an object as the first object in the project.
"insert project" inserts a "saved" project after the current project.
"reset project" resets the current project to its default content.
"delete project" replaces the current project with the basic "mesh and cylinder" project.
Hints
- Use the "project save" option often!
- Project 2 uses object types mesh. n-sided prism, pearl, cylinder, hollow prism, spokes, trapezium.
- Project 3 shows how to create a knot using the object type "3D closed curve". Compare this to project 8!
- Project 4 shows interlinked oval rings created with the object type "torus".
- Project 5 show how to join several projects (here projects 1,3 and 4) into one project (using the "save" and "add" buttons of the "project" setter bar).
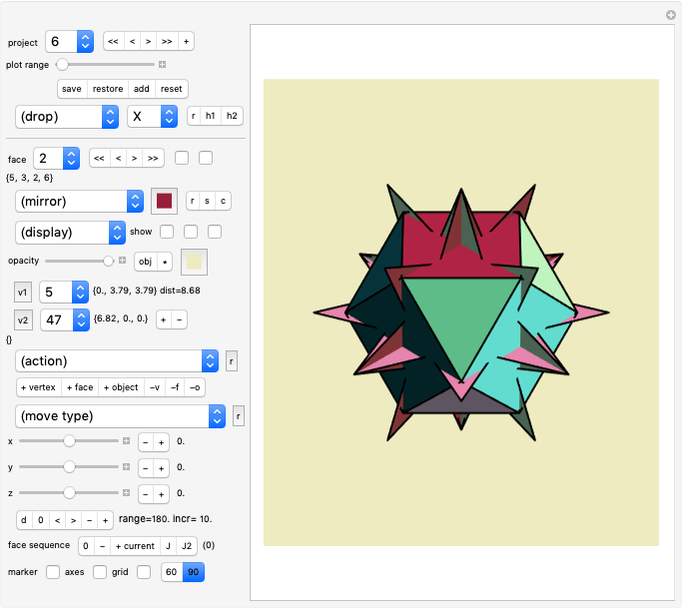
- Project 6 shows a simple staircase, created using the "spiral stairway" and "spiral tube" object types.
- Project 7 shows an abstract sculpture created automatically with the object type "random 3D curve". Select action "randomize 3D curve" to create a new sculpture.
- Project 8 is a "3D closed curve" (tube) with variable width, defined by fourteen objects of type "point". The variable width is indicated by size = 0. The widths and positions of the tube are given by the "size " values and the {x,y,z} values of the fourteen "point" objects.
- Project 9 shows how to create "flower vases" using the object type "3D curve (tube)".
- When constructing a project or amending an existing project, the action "add mesh" is very useful as a foundation to build on. Also, click the axes toggle as a further help, since it displays the coordinates.
- in project 2, try out the randomizing "actions". Some results are very surprising.
- Try out the various object types to get familiar with them; study the given project examples. Explore!
Permanent Citation
 Molecule Construction Set
Karl Scherer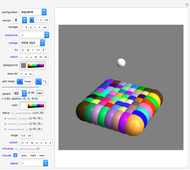 Spheres Construction Set
Karl Scherer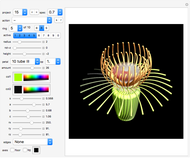 3D Flower Art
Karl Scherer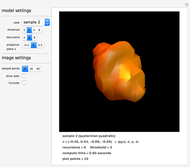 Quaternion Julia Set
Fred Klingener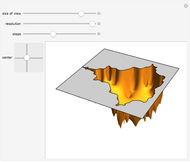 Mandelbrot Set Print
Michael Schreiber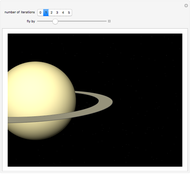 Saturn's Rings and the Cantor Set
Jeff Bryant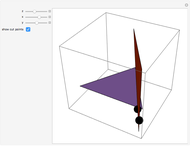 Intersecting 3D Triangles
Michael John Twardos 3D Curve Constructor
Karl Scherer Limited Mandelbar Sets
Michael Schreiber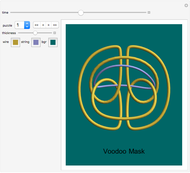 Disentangling Wire-and-String Puzzles in 3D
Karl Scherer
-
 Polyhedral Playground
Karl Scherer -
 Tiling Constructor, Tile-Dragging Variant
Karl Scherer -
 The Catenax Puzzle
Karl Scherer -
 Angel Puzzle
Karl Scherer -
 Constructing and Manipulating Graphs
Karl Scherer -
 3D Construction Set
Karl Scherer -
 Blended Quadrilaterals
Karl Scherer -
 Rotating Polyhedra in Space
Karl Scherer -
 The Misdirection Game
Karl Scherer -
 Tensegrity
Karl Scherer -
 Nowhere-Neat Tilings
Karl Scherer -
 Pocket Calculator
Karl Scherer -
 Area Puzzle
Karl Scherer -
Molecule Construction Set
Karl Scherer -
 The Ray Puzzle
Karl Scherer -
 Animated Model of an Industrial Robot Arm
Karl Scherer -
 Model of an Industrial Robot Arm
Karl Scherer -
 Color-Blended Circular Tiles
Karl Scherer -
 Rep-Tiles
Karl Scherer -
 Armed Balloons Puzzle
Karl Scherer